How to Clean a Window AC Drain Line
If your room starts getting damp or you notice water leaking from your window air conditioner, you’re not alone—and it usually comes down to clogged drainage. Knowing how to clean window ac drain line lets you stop overflow and restore proper condensate flow. In this guide, you’ll learn where the drain path is, how to flush it safely, and what to do when the unit still won’t drain.
For more help, see our Window AC Water Problems: Leaks, Drips, and Drain Fixes guide.
What the drain line does and why it clogs
How condensate moves through a window AC
Window ACs remove moisture from indoor air as the evaporator coil cools it. That condensed water collects in the unit’s drain pan area, then drains through a drain opening, plug, tube, or channel near the rear of the cabinet. Many window models route water into a small tray where it can exit through the drain outlet; some splash a portion onto internal components, but standing water inside still signals a blockage or wrong tilt. When the drain path clears, water flows out in a steady rhythm and you don’t see puddling or dripping indoors.
Common signs the drain line is blocked
Watch for these clear indicators: water dripping from the front grille or sides of the unit, a water line or puddle inside the indoor section, gurgling or sloshing sounds that get louder as the pan fills, and an AC that seems to run but leaves moisture behind. You may also notice the window frame around the rear becoming wetter than normal if condensate can’t exit properly. If the unit has a drain plug or hose, you might see water backing up at that outlet area instead of moving out through the drain.
Why water pools in the pan or leaks indoors
Clogs form when condensate carries dust, lint, and debris into the drain opening—then slime and algae grow as moisture stays warm and stagnant. Dirty filters increase particulate load, so the drain path gets fouled faster. If the unit is tilted the wrong way (or not tilted enough), condensate can’t reach the outlet, so it overflows into the indoor area. Leaks indoors can also come from a cracked or warped drain pan, a partially detached drain tube, or a missing drain plug that lets water spill instead of channeling through the outlet.
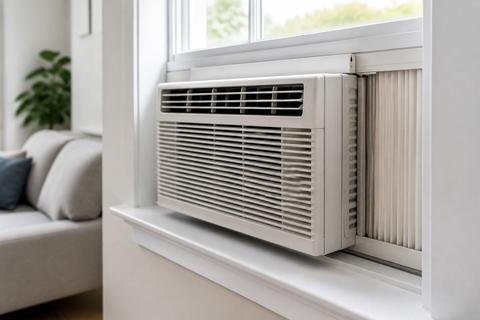
Find the drain path on your unit
Locate the drain hole, plug, or tube
Start by unplugging the unit (or turning it off at the power cord). Then look at the rear bottom area of the cabinet—many window ACs place the drain opening or tube near the back where condensate would exit. Some models include a small plastic drain plug you can remove; others use a short drain hose or tube connected to a channel. Use your user manual if available, because the drain location varies by brand and model. If you see a drain hole or outlet, clear access from the inside so you can flush it later without forcing tools through delicate parts.
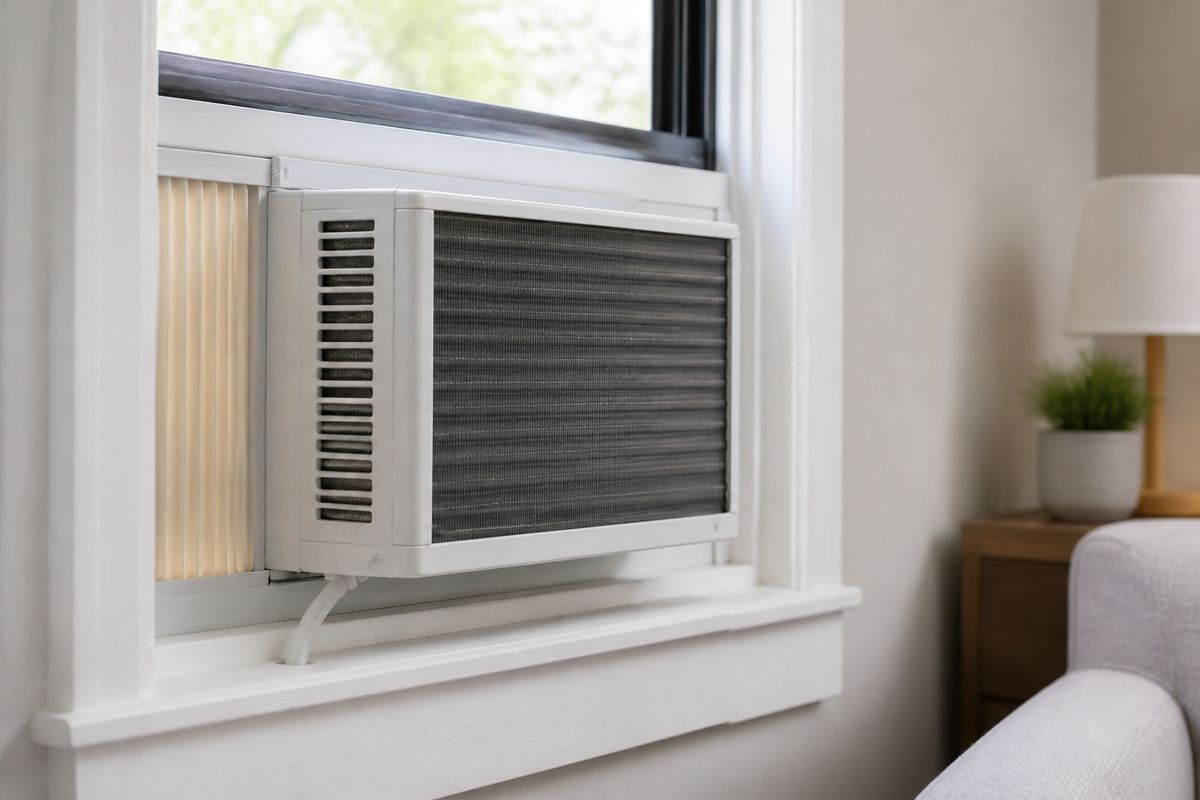
Check the drip tray and drain pan
The drain pan sits beneath the evaporator coil area and collects condensate. If it’s removable, inspect it for standing water, debris buildup, or dark slime around the drain opening. Even if you find the drain outlet, a dirty pan can still hold water and push it toward overflow points. Remove any visible gunk carefully with a soft cloth or soft brush to avoid scratching plastic surfaces. If your unit uses a drip tray that slides out for cleaning, remove it and locate where the pan’s outlet connects to the drain opening.
Identify brand-specific layouts like LG and GE
LG and GE window units often use a cabinet drain outlet paired with a channel that leads condensate into the pan system. LG commonly has accessible drain points behind lower front panels or near the rear, depending on the series, so you may need to remove the front grille to reach the drain area. GE units also frequently route condensate through a drain opening and may include a plug or pathway that aligns with the rear of the cabinet. Match what you see to your model number—because guessing the drain location can mean you spend time cleaning the wrong channel while the real clog stays in place.
Safety and prep before cleaning
Turn off power and remove the unit if needed
Before touching any drainage parts, turn the unit off and unplug it. If your window AC has a power cord with a leakage-detector feature (UL-required LCDI), press RESET firmly until it clicks if the cord is tripped; if it trips again immediately, the cord or wiring isn’t safe to work through. If the drain outlet is difficult to reach from inside the room, remove the window unit according to the manufacturer’s instructions. Many window units should be handled with care so the cabinet doesn’t twist, which can change how water sits in the pan during cleaning.
Gather a soft brush, towels, vinegar, and a turkey baster or squeeze bottle
Use tools that won’t damage plastic or coils: a soft brush, microfiber towels, and a small amount of diluted white vinegar. For flushing, use a turkey baster, squeeze bottle, or small pitcher so you can push warm water into the drain opening without flooding the entire cabinet. Avoid metal probes that can crack the drain outlet or puncture tubing. If you choose a mild cleaner, use a product safe for plumbing/drain lines and follow label dilution—then rinse thoroughly with warm water after.
Protect floors, windows, and nearby electronics
Lay down towels under the unit and protect the window sill and floor before you flush the line. Keep electronics away from the splash zone, including power strips and outlets near the window. If you remove the unit, set it on a towel on a stable surface. Work slowly when pouring water so you don’t force dirty condensate into places it shouldn’t go. Plan to capture runoff in a shallow tray or towels, especially when the line is currently clogged and will release a burst of gunk.
How to clean the drain line step by step
Clear visible debris from the drain opening
Start with dry removal so loosened material doesn’t spread inside the unit. Remove the front grille or access panel if your drain opening isn’t reachable through the existing ports. Use a soft brush and a dry cloth to remove lint, dust clumps, and visible gunk from the drain opening, plug area, or accessible drain tube. If your unit uses a plug, remove it carefully, then wipe the area clean. Clear as much as you can before flushing so the rinse carries out the remaining buildup instead of pushing it deeper.
Flush the line with warm water and a mild cleaner
After removing visible debris, flush the drain path. Place towels and a shallow tray under the outlet area so water and debris don’t run elsewhere. Pour warm water (not boiling) into the drain opening using a turkey baster or squeeze bottle. If your drain path is heavily soiled, add a small amount of mild cleaner to the flush water per label directions, then rinse again with plain warm water. Keep the flow controlled—small, steady flushes work better than dumping a large amount at once.
Use vinegar carefully to break up slime and buildup
If you see green/brown slime or the drain has an odor, use diluted vinegar as a targeted cleaner. Pour a small amount of diluted white vinegar into the drain opening and let it sit for about 10–15 minutes to loosen algae and organic buildup. Then flush with warm water using the baster or squeeze bottle until the rinse runs clear. Don’t overfill the cabinet—excess liquid can overflow the pan before the clog clears. Use towels to catch any initial runoff since vinegar flushes can dislodge compacted gunk.
Check that water flows freely into the tray and out the drain
Once flushing is done, confirm proper condensate movement. Slowly add a small amount of warm water into the drain area (or run a short fan-only cycle if you prefer) so water reaches the pan outlet. You should see water move into the drain path and exit into the tray or drain outlet with no backing up or sudden overflow inside. Listen for normal, steady drainage rather than repeated gurgling that indicates blockage. If water still accumulates, return to clearing the outlet and flushing again—most clogs require more than one pass.
What to do if the window AC still will not drain
Unclog the pan, drain hole, or outlet again
If the unit still won’t drain, the clog is usually deeper in the pan outlet or the external drain outlet path. Reopen access and remove any standing water from the pan with a towel or small scoop so you can work cleanly. Then repeat the process: clear debris at the drain hole, flush with warm water in controlled amounts, and use diluted vinegar only if slime is present. Focus on the outlet where water should actually leave the cabinet; cleaning only the opening you can see won’t fix a blockage that’s downstream.
Inspect for a kinked, damaged, or missing drain tube
A kinked, cracked, or disconnected drain tube can stop water from reaching the outlet even after you clean the opening. Inspect any visible tube from the pan toward the outlet; look for bends that reduce flow, loose fittings, and brittle plastic that may split. If the tube is missing or not seated properly, water backs up and overflows into the cabinet. Replace damaged components using the correct part for your model—generic tubing may not fit the same connections or mounting points securely.
Make sure the unit is tilted correctly for drainage
Window ACs must tilt slightly toward the outside so gravity pulls condensate to the drain outlet. The typical tilt is about 1/4 to 1/2 inch downward toward the exterior; if it’s level or sloping inward, water pools in the pan and leaks indoors. Confirm the tilt by checking the left-to-right and front-to-back alignment after installation. Adjust the window support or install shims under the lower frame side as needed so the cabinet’s rear drainage outlet stays the lowest point.
When a drain kit or replacement hose makes sense
If repeated cleaning doesn’t restore drainage, the drain path may be poorly aligned, damaged, or hard to access due to the unit’s design. A manufacturer-approved drain kit can help route condensate more reliably when the original drain outlet is restricted. Replacement hoses or tubes make sense when you find cracks, chronic kinking, or a loose connection that you can’t secure. Choose parts matched to your brand and model number to ensure correct fit and sealing so water goes to the right exit point instead of re-entering the pan.
Prevent future clogs and leaks
Set a regular cleaning schedule during cooling season
Prevention starts with routine upkeep: check and clean the drain path at least once early in the cooling season, then again if you notice slow drainage, musty odor, or moisture buildup. If the unit runs heavy use daily, increase the frequency to keep slime from taking hold. A quick maintenance habit is to remove front grille debris and wipe the accessible drain opening so dust doesn’t accumulate. Regular cleaning reduces the amount of organic material that turns condensate into thick slime inside the drain channel.
Reduce dust, algae, and mold buildup
Algae and mold grow when moisture stays warm and trapped in the drain area. Use a cleanable filter and keep the area around the unit free of dust so condensate carries less debris into the drain. During high humidity stretches, keep the AC fan mode balanced and avoid long periods where the unit cycles in a way that leaves stagnant moisture sitting in the pan. If you detect odor, address the drain pathway early—waiting lets organic buildup spread farther into the pan outlet and deeper tubing.
Keep the filter and coils clean so less moisture and debris collect
A clogged air filter forces more dust into the unit and increases condensate carryover, which accelerates drain clogs. Remove the filter from the front grille, rinse with water if it’s washable, let it dry completely, and reinstall it. For coil cleanliness, follow manufacturer guidance—condensate forms on cold coils, so coil dirt can change how moisture behaves and how much debris collects in the pan. Cleaner airflow means less particulate load in the condensate, which keeps the drain opening clear longer and reduces overflow risk.
When to call a technician or replace parts
Signs of a cracked pan, failed seal, or internal blockage
Call a technician if you find cracks in the drain pan, warped plastic around the outlet, or evidence of a failed seal that keeps water escaping indoors. Internal blockage can also be present when water won’t drain even after repeated flushing and vinegar treatment. If the unit shows signs of water damage to wiring channels or you can’t access the drain outlet without disassembling major components, stop DIY work. Internal pan damage often requires part replacement because a cracked pan can continue leaking even if the drain line is clear.
When repeated overflow points to a bigger issue
Repeated overflow after thorough cleaning indicates a deeper drainage design issue—such as improper slope during installation that you can’t correct, a consistently restricted outlet, or internal drainage misrouting. If you keep finding standing water in the pan or the unit repeatedly backs up soon after cleaning, the problem is not just a surface clog. Also consider that an iced-over evaporator coil can contribute to excess water later; in that case, technicians can inspect coil condition and airflow problems. Persistent drainage failures should be diagnosed rather than repeatedly flushed.
What to ask for if you need drain line or pan replacement
If parts replacement is needed, ask the technician to identify the exact clogged segment and whether the issue is the drain outlet, drain tube/hose, drain pan, or an internal channel. Request the correct manufacturer part for your exact brand and model number to ensure proper fit and sealing. Ask them to verify cabinet tilt and drainage routing after installation, because the correct exit path depends on how the unit sits. If the technician finds internal blockage, ask whether they recommend cleaning the pan system and flushing the full drain route before swapping parts.
Frequently Asked Questions
Where is the drain line on a window AC unit?
On most window AC units, condensate drains through a small hole, plug, tube, or channel near the rear of the cabinet and into the drip tray or drain pan. The exact location depends on the brand and model. In many cases, you can reach the drain opening from the front by removing a grille or access panel, then flush toward the rear outlet. Some units have a removable drain plug; others rely on a built-in drain channel. Check the area near the bottom rear of the cabinet because that’s where gravity carries water for exit.
Can I pour vinegar into a window AC drain line?
Yes, a small amount of diluted vinegar can help loosen algae and slime in the drain path. Use it carefully so you don’t flood the cabinet or cause overflow while the drain is still blocked. Pour the diluted vinegar into the drain opening, wait about 10–15 minutes, then flush with warm water. After flushing, use towels under the unit to catch the first runoff because vinegar can dislodge buildup. Avoid pouring large volumes at once—controlled amounts work better and reduce mess inside the cabinet.
Why is my window AC not draining water?
The most common causes are a clogged drain opening, a dirty pan, a kinked or missing drain tube, or an improperly tilted unit that keeps water from reaching the outlet. Standing water inside the cabinet typically means the pan can’t drain to the exit point, so condensate overflows. Start by clearing visible debris at the drain hole or plug area, then flush warm water through the line. If you still see pooling, inspect for tube damage or a disconnected hose and correct the cabinet tilt so the rear drainage outlet is the lowest point.
Should a window air conditioner always drain water?
Not always. Some moisture is used by the unit for cooling and may evaporate during normal operation. But standing water, leaking, or overflow usually means the drain path needs attention. If you notice water dripping indoors or puddling on the window frame and sill, treat it as a drainage problem rather than normal condensation. Healthy drainage still may include occasional internal splashing sounds depending on the model design, but water should not accumulate in the room-side area.
Do all window AC units have a drain plug or hose?
No. Some models use a drain plug, some have a small drain hole, and others route water through a channel into the pan. A few may support an add-on drain kit or hose. The easiest way to find yours is to look at the lower rear cabinet area and any accessible drain opening near the pan region. If you can’t find a plug, follow your unit’s manual for the correct drain outlet location. Matching the cleaning method to your drain design prevents unnecessary disassembly and helps clear the true blockage.