How to Install, Replace, or Remove an InSinkErator Disposal
If your kitchen sink is clogging faster than it should or the disposal is leaking, replacing it is often the fastest way to restore reliable drainage. Knowing How to Install, Replace, or Remove an InSinkErator Disposal can also save you from common mistakes like improper mounting or unsafe electrical hookups. Whether you’re starting fresh or swapping an older unit, you’ll need the right prep before you touch plumbing or power.
How to Install an InSinkErator Garbage Disposal
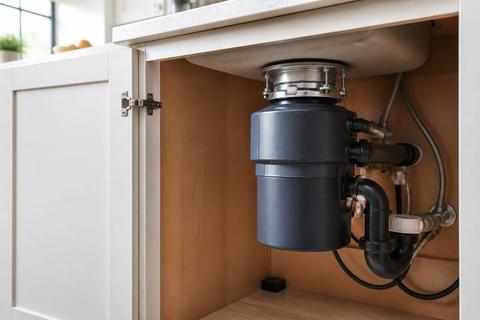
Installing an InSinkErator disposal is a straightforward process when you prepare the sink flange correctly, mount the unit securely, and make the drain and power connections safely. Before you start, identify whether your setup includes a dishwasher inlet, confirm the mounting configuration on your sink, and gather the tools you’ll need. The goal is a tight seal at the flange and a solid electrical connection that follows your model’s instructions and local code requirements.
Step 1: Prepare the sink and mounting flange
- Turn off the disposal switch (wall) and the breaker supplying power to the kitchen circuit.
- Remove any items from under the sink and clear the cabinet so you can work standing or kneeling comfortably.
- Remove the old mounting hardware if this is not a first-time install; otherwise, check the existing sink flange for damage, looseness, or old putty residue.
- If the sink flange is bare or needs re-seating, clean it thoroughly and apply fresh plumber’s putty or per the disposal manual’s flange-seal instructions.
- Ensure the sink flange sits flat—gaps cause leaks.
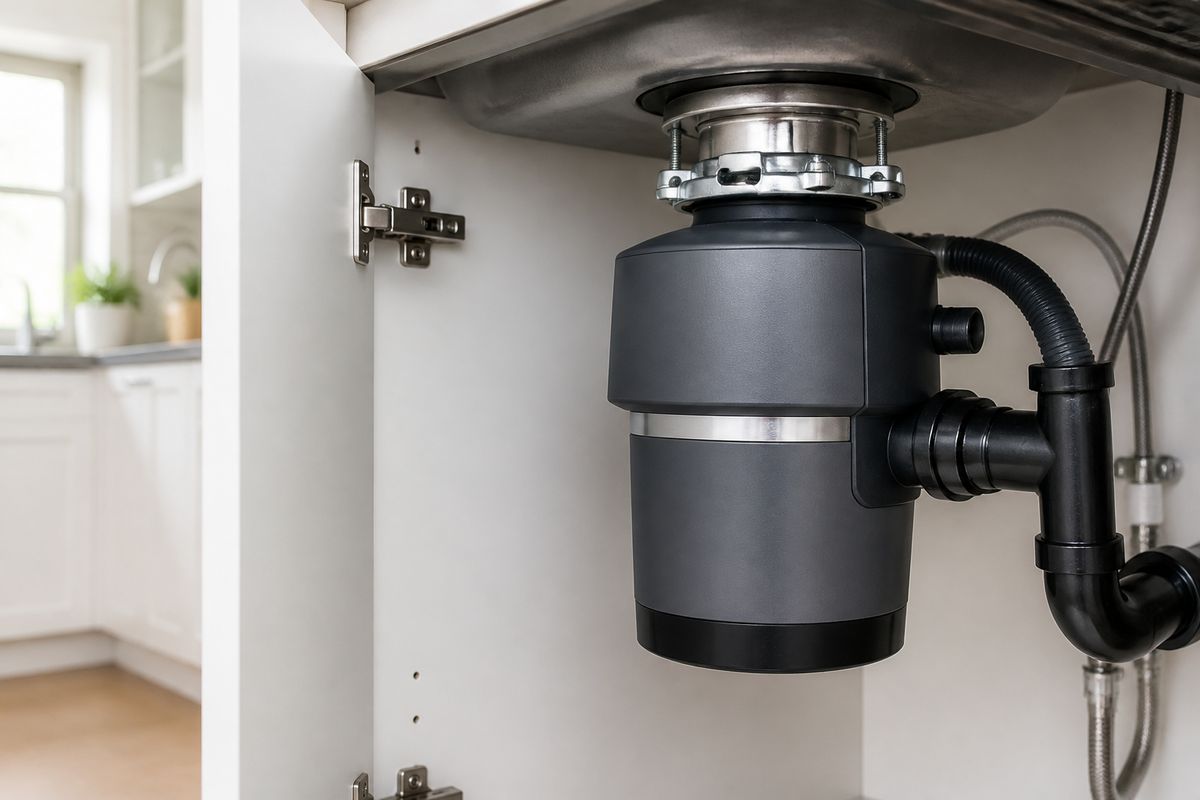
Step 2: Mount the disposal body
- Insert the disposal mounting ring/basket into the sink opening according to your model’s hardware stack order.
- Use the provided wrenches/fasteners to tighten the mounting assembly securely while keeping the flange aligned.
- Position the disposal so the discharge outlet lines up with the drain pipe/discharge tube.
- Lift the disposal into place and lock it to the mounting assembly using the manufacturer’s tab/lock method (the unit should feel secure and not wobble).
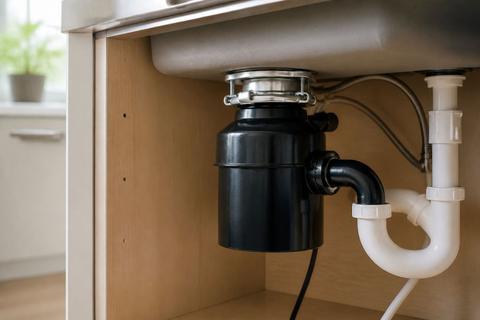
Step 3: Connect the drain and dishwasher inlet (if applicable)
- Install the dishwasher drain hose clamp to the dishwasher inlet only after you remove the factory knockout plug inside the grind chamber (if your model ships with a plug).
- Attach the discharge tube to the drain outlet and tighten any compression fittings or clamps snugly.
- Route hoses so they don’t kink when the disposal is locked into the mount position.
- Tighten all connections you touched so leaks don’t start after the first use.
Step 4: Connect power and restore service
- Confirm the electrical connection method matches your unit: follow the wiring diagram in the installation instructions.
- Make the required connections (wire nuts or terminal connections per manual) and secure the wiring under the switch box.
- Restore power at the breaker.
- Run water, flip the wall switch on, and confirm the disposal hums and drains normally with no leaks at the sink flange or discharge area.
Full Guide: How to Install an InSinkErator Garbage Disposal
How to Replace an Old InSinkErator Garbage Disposal
Replacing an old disposal changes the workflow mainly at the start: you detach and remove the failed unit, then you install the new model using the existing mounting assembly when it’s compatible and in good condition. You still need to match the discharge connection and confirm dishwasher inlet plumbing. If the mounting hardware is worn, rusted, or doesn’t fit the new unit securely, replace those parts before you mount the new disposal.
Step 1: Disconnect power and remove the old unit
- Turn off power at the breaker; do not rely only on the wall switch.
- Disconnect the disposal wiring per the existing switch box method (cap the wires if the old unit’s lead is separate).
- Disconnect the discharge tube from the drain outlet and remove the dishwasher inlet hose if attached.
- Support the disposal while loosening the mounting connection so it doesn’t drop onto your plumbing or countertop.
- Lower and remove the old unit from the sink opening.
Step 2: Inspect and decide whether to reuse mounting hardware
- Inspect the mounting ring, anti-jam components, and any gasket/sealing surfaces for cracks, bends, or hardened debris.
- Check whether the old mounting assembly is compatible with the new InSinkErator model line and diameter.
- If any part is damaged or does not seat flat, replace the mounting hardware instead of forcing fit.
- Clean the sink flange seating surface so the new setup seals properly.
Step 3: Install the new disposal in the same location
- Seat the mounting assembly components in the correct order for your new unit and lock them securely.
- Lift the new disposal into position and lock it to the mounting bracket.
- Reconnect the dishwasher drain inlet only if your model supports it, and remove the knockout plug from the grind chamber if required.
- Connect the discharge tube to the drain outlet and tighten fittings/clamps.
Step 4: Restore power and check for leaks
- Restore power at the breaker.
- Run water and switch the disposal on for a short test cycle.
- Watch the sink flange area for water beads and check around the discharge tube connection for drips.
- If water appears at the sink flange, you likely need to re-seat the flange with fresh sealant; if water appears at a side connection, tighten the clamp or replace the discharge tube gasket.
Full Guide: How to Replace an Old InSinkErator Garbage Disposal
How to Remove an InSinkErator Garbage Disposal Safely
Safe removal starts with eliminating electrical risk, then disconnecting plumbing connections without damaging sink or drain components. Before you detach the unit, clear under the sink so you can work cleanly, and keep control of the disposal so it doesn’t stress the discharge tube or wiring. Once the unit is free, proper handling matters—dispose of it according to local rules.
Step 1: Shut off power and prepare the work area
- Turn off power at the breaker for the kitchen circuit powering the disposal.
- Shut off water access if your setup includes a dedicated shutoff you can reach.
- Clear the cabinet under the sink and place a bucket and towels in case residual water drips.
- Disconnect the disposal from the electrical supply using the wiring connection method in your existing switch box.
- Verify power is off by ensuring the unit cannot be turned on from the wall switch.
Step 2: Disconnect plumbing connections
- Disconnect the dishwasher drain hose from the disposal inlet if it’s connected.
- Loosen the discharge tube connection from the sink drain/discharge elbow.
- Ensure the discharge tube is fully free—do not pull the unit while the tube is still attached.
- If there’s tight hardware, use the correct wrench/pliers and stop if you risk deforming the fittings.
Step 3: Detach and lower the disposal
- Support the disposal weight with one hand/arm while you release the mounting tabs/lock that hold it to the mounting assembly.
- Follow your model’s release method (turn tabs, slide latch, or lift-lock) so the unit comes down smoothly.
- Lower the disposal straight down and out of the sink opening.
- Wipe away leftover residue from the mounting surface so the area is ready for a new install or cap.
Step 4: Handle the unit and leave the plumbing safe
- Cap the exposed drain opening if you’re not installing a replacement immediately.
- Remove any dishwasher inlet attachments and clean the grind chamber area so debris doesn’t fall into the drain.
- Dispose of the old disposal according to local appliance disposal guidelines (metal and electrical components may require special handling).
Full Guide: How to Remove an InSinkErator Garbage Disposal Safely
Frequently Asked Questions
Can I install an InSinkErator disposal myself?
Many homeowners can handle a standard installation if they are comfortable with basic plumbing and electrical work, but they should always follow the product instructions and local codes. If the setup involves new wiring (running conductors to the switch box) or unusual plumbing that requires replacing drain components or modifying the electrical circuit, a licensed professional is the safer choice. Even if you’re experienced, the disposal must mount correctly to prevent leaks and must be wired to avoid shock risks.
Do I need to replace the mounting assembly when replacing a disposal?
Not always. If the existing mounting hardware is in good condition and compatible with the new unit, it can be reused. Replace the mounting hardware if it’s cracked, bent, corroded, or no longer seats flat at the sink flange. A secure fit matters because a loose mount can create leaks at the top seal and vibration during operation.
What should I do before removing an InSinkErator disposal?
Turn off power at the breaker, disconnect the unit from the electrical supply, and shut off water if needed. It’s also wise to clear the cabinet, place a bucket or towel under the trap, and review the removal steps before starting. Remove all plumbing connections (dishwasher inlet hose and discharge tube) before you release the mounting tabs, so the unit doesn’t strain the fittings or wiring as you lower it.