InSinkErator Reset Button
Your InSinkErator suddenly won’t turn on, and that red button you’re staring at—the insinkerator reset button—feels like the only way forward. When the disposal trips, it locks out the motor to prevent damage. The good news: a safe reset and a quick jam check often restore normal operation in minutes.
For more help, see our InSinkErator Garbage Disposal Not Working: Fix Every Cause guide.
What the Reset Button Does
Why disposals trip the overload protector
The insinkerator reset button is part of the motor’s overload protection. When the motor draws too much current—most commonly from a jam or heavy load—it shuts down and trips to prevent overheating or electrical damage. You’ll notice the disposal won’t start from the wall switch, and the reset button may pop out. Even if the sink drains, a jamged flywheel can still trigger overload protection because the motor can’t reach normal speed.
Trip causes you can address include stuck food debris, a foreign object, and running the disposal too long without adequate water flow. If the unit overheats, the reset button may also refuse to stay in until the motor cools.
How the reset button differs from the wall switch
The wall switch controls power flow to the disposal, but it does not “repair” the motor. When the overload protector trips, the switch may still be in the ON position, yet the disposal remains locked out until you reset it. In other words: the wall switch is the command to start, while the reset button is the safety latch that clears a fault.
That means troubleshooting should follow a simple rule: if power is confirmed at the switch but the disposal stays off, focus on the overload reset and any jam. If the disposal never trips and only fails to respond, the issue may be electrical (switch, outlet, breaker, or wiring) rather than overload protection.
Where to Find the Reset Button
Locate the red button under the unit
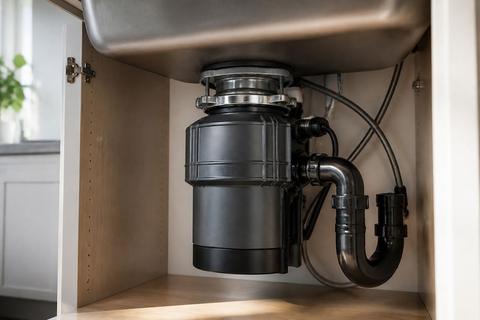
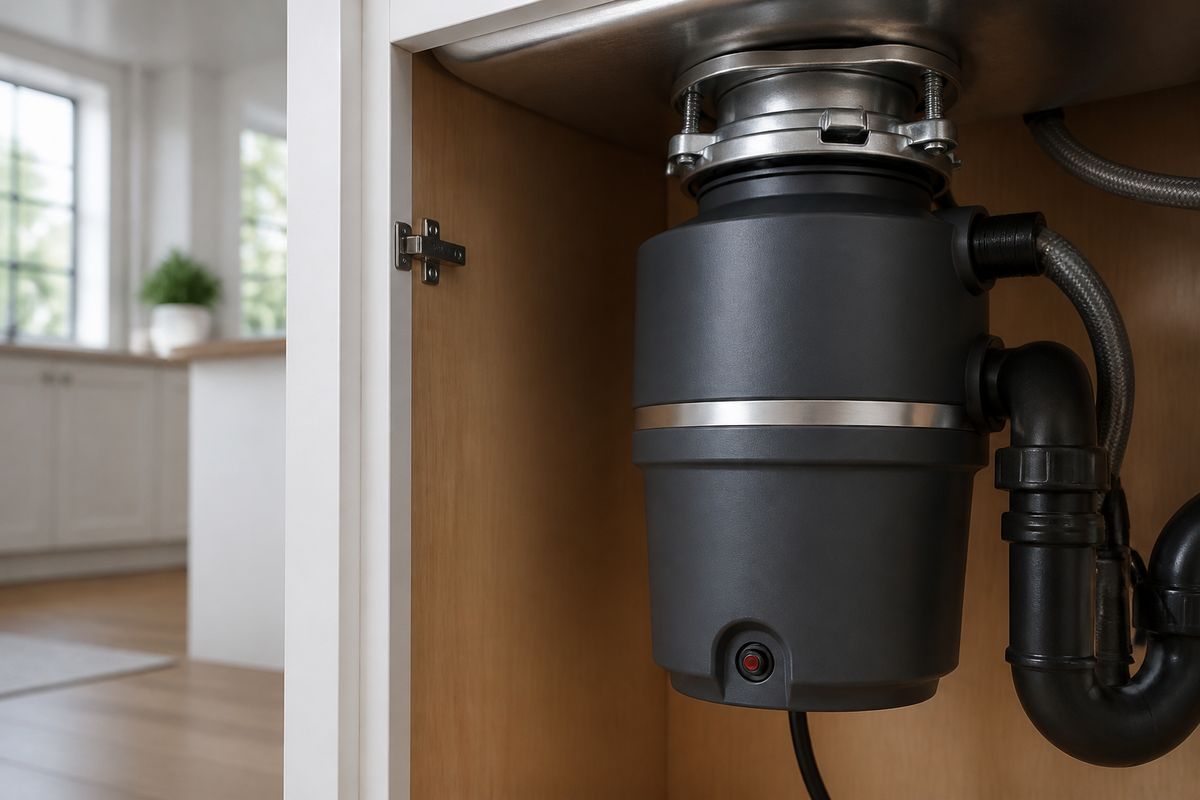
On most InSinkErator models, the reset button is a small red overload protector button on the underside of the disposal unit, near the center or along the bottom housing. You may need a flashlight and access from below the sink to see it clearly.
Because the button sits under the disposal, it’s not meant to be pressed repeatedly from above. The red button is physically designed to be depressed by hand with the unit powered off at the switch (and ideally disconnected at the outlet or breaker).
If your disposal uses a protective sound-insulation panel or cabinet cover, remove the cover to reach the underside safely before pressing the reset.
Know when the button may be hidden or hard to reach
Some installations place the underside of the disposal close to a cabinet wall or plumbing, making the red button awkward to access. If the button is blocked by pipes, you can still reach it safely from the side—avoid forcing your hand between moving parts and plumbing lines.
In certain setups, the underside may be partially covered by insulation wrap or a lower mounting plate. Before you press the reset button, reposition your work area so you can see what you’re touching. Clear the space under the unit so you can press firmly straight in without slipping.
If you cannot safely access the underside, stop and troubleshoot the electrical side (switch, outlet, breaker) first—no “reach and guess” work.
How to Reset an InSinkErator Safely
Turn off power before touching the disposal
Before pressing the reset button or inspecting the underside, cut power to the disposal. Turn off the wall switch that controls the unit, then switch off power at the outlet or the circuit breaker if you can access it safely.
This prevents accidental startup while your hand is under the sink. Also keep your hands away from the grind chamber—if the disposal is jammed, forcing anything in can worsen the problem or damage components.
Use a flashlight to identify the red overload reset button location, so you’re not fumbling while the unit is still energized.
Press the button until it stays in
With the wall switch OFF (and power disconnected if possible), locate the red insinkerator reset button on the underside. Press it in firmly until it clicks and stays in.
Then restore power and try turning the disposal on from the wall switch. If it stays reset, the disposal should hum and begin grinding immediately when water runs.
If the button pops back out the moment you attempt to start the disposal, that indicates a continued fault—most commonly a jam or an overheating condition that needs time to clear.
Wait for the motor to cool if it has overheated
When the overload protector trips due to overheating, the reset button may stay out until the motor reaches safe operating temperature. If the button pops out again quickly, do not keep pressing it repeatedly.
Turn the switch OFF and wait about 10 minutes for cooling. Then press the reset button again until it stays in and try from the wall switch.
If cooling does not solve the issue, switch to jam troubleshooting. A motor that overheats repeatedly almost always has a mechanical load problem (debris or an obstruction) rather than a “one-time” electrical glitch.
If the Disposal Still Won’t Turn On
Check the outlet, switch, and reset button again
Start with the simplest electrical path. Make sure the wall switch is in the ON position and confirm the insinkerator reset button is fully pressed in and stays in after you attempt to start the unit.
If the reset button won’t remain set, treat it as an overload fault that needs a jam check rather than endless re-resetting. Next, verify the disposal’s outlet has power (if your model is plugged in) or that the disposal circuit breaker is not tripped.
If the wall switch is separate from the outlet and you have a known-safe way to check it, test the switch operation. A failed switch can make it seem like the disposal “won’t reset,” when the disposal never receives power to begin with.
Inspect for jammed food or a stuck flywheel
A humming disposal with no grinding is a strong sign of a jammed flywheel. Turn off power at the wall switch and disconnect at the outlet or breaker if possible, then clear the jam before restoring power.
Use tongs to remove visible objects from the grind chamber—never put your hands inside. If nothing is visible and the flywheel feels stuck, use a disposal wrench (next section) to manually free the mechanism from below.
Once the jam is cleared, press the red insinkerator reset button again, then restore power and test operation with water running.
Test the circuit breaker and GFCI outlet
If the disposal still won’t run, check the circuit protection devices. Test the circuit breaker for the disposal circuit—flip it OFF and then back ON to re-seat it if it tripped.
If the disposal is connected to a GFCI outlet, check the GFCI’s TEST and RESET buttons. Resetting the GFCI often restores power when it has tripped due to moisture, drain splash, or wiring issues.
If the breaker or GFCI trips again immediately after reset, stop resetting the unit and focus on internal electrical issues or professional service, because repeated tripping points to a fault beyond a simple overload.
Common Parts Related to the Reset Button
Overload protector and internal reset mechanism
The insinkerator reset button is the user-accessible part of the overload protector. Internally, the system uses a thermal/mechanical safety design that opens the circuit when current draw or temperature exceeds safe limits. When the overload trips, it interrupts motor power until you manually reset the mechanism.
If the button stays out or pops out quickly even after cooling, that points to continued overheating conditions or a jam causing repeated overload events. The reset button itself is not meant to wear out from normal use, but electrical faults or mechanical binding can make it seem like “reset doesn’t work.”
Understanding this relationship helps you troubleshoot in order: reset button first (for overload latch), then jam check, then electrical protection (breaker/GFCI).
Wrench tool for clearing a jam
InSinkErator disposals ship with a disposal wrench (often a 1/4-inch hex “Jam-Buster” style tool) used to free a jammed flywheel. This wrench is inserted into a hex socket on the bottom of the unit, allowing you to rotate the flywheel manually.
The wrench is used only after power is cut. It prevents damage that can occur if you try to force the motor through a jam.
Once the flywheel turns freely, remove any obstruction, then press the insinkerator reset button and restore power so the motor can run without triggering overload.
When a damaged switch or part may need replacement
If the insinkerator reset button presses correctly and the outlet/breaker show power, the issue could be a damaged wall switch, wiring connection, or an internal switch component. A wall switch that fails can prevent the motor from receiving the start command even with overload protection reset.
Signs that point beyond resetting include: repeated overload trips with no jam found, a disposal that never hums even after a correct reset, or a reset button that does not engage at all.
Because internal electrical repairs vary by model and may involve sealed components, replacement may be the safest path for worn switch parts or other failed components. In this case, professional diagnostics reduce risk.
When to Use the Hex Wrench Instead
Freeing a jammed disposal before resetting
Use the hex wrench when you suspect a mechanical jam rather than a simple overload latch. A disposal that hums but doesn’t grind is the clearest sign: the motor is trying to turn the flywheel, but something is stuck.
To clear the jam, cut power at the wall switch and disconnect at the outlet or breaker. Then insert the wrench into the hex socket on the bottom of the disposal and work it back and forth until the flywheel turns a full revolution.
After freeing the jam and removing any obstruction with tongs, press the red insinkerator reset button, then restore power.
Finding the wrench slot on the bottom of the unit
Look under the disposal for the hex socket—this is the opening designed for the wrench. It’s typically centered on the underside housing and may be covered by a small protective cap or simply recessed.
If you don’t see the hex socket immediately, use a flashlight and rotate your view under the unit to locate the correct recess rather than pressing on unrelated components. The correct location is designed to accept the 1/4-inch hex wrench.
Once you find the socket, keep the wrench straight while turning. Don’t force it if it doesn’t engage; reposition and try again after confirming power is off.
Prevention and Maintenance Tips
Avoid overloading the disposal
Overloading the disposal increases motor load and leads to overload trips. Feed scraps in smaller amounts and avoid dumping large batches of food at once. Hard, dense items like large vegetable chunks or bones can create jams that force the motor to strain.
Never run the disposal without enough water to move debris through the grinding chamber. Let the unit clear between additions so the motor doesn’t stay under constant heavy load.
If your disposal frequently trips, it’s a sign that it’s being asked to grind too much at once or that debris is accumulating. Change your loading habits and stop using the unit for items that don’t break down easily.
Run cold water during and after use
Cold water helps keep food particles flowing and supports consistent grinding. Run cold water when you start the disposal, keep it running while scraps are ground, and allow it to run briefly after you finish.
This water flushing reduces leftover buildup that can contribute to jams and repeated overload protector trips. It also helps the grinder maintain proper load rather than struggling against trapped debris.
Avoid pouring hot grease or heavy fats into the disposal. If fats need disposal, let them cool and solidify in the trash rather than overloading the system.
Reduce future trips with regular cleaning
Regular cleaning prevents debris buildup that can jam the flywheel and trip overload protection. After grinding, use a simple inspection: remove visible debris and keep the grind chamber clear.
For odor control and cleaner maintenance, use disposal-safe cleaning methods like grinding small amounts of baking soda followed by vinegar, then flush with plenty of water. Always avoid harsh chemicals that can damage internal parts or create unsafe reactions.
If the disposal has frequent stoppages, schedule deeper cleaning and inspect the grind chamber for stuck residue. Consistent maintenance lowers the chance that the insinkerator reset button is needed repeatedly.
Frequently Asked Questions
Why is my InSinkErator disposal not turning on after I press reset?
It may still have a jam, a tripped breaker, a faulty outlet, or a worn switch. If the reset button will not stay in or trips again quickly, power should be checked and the unit may need service.
Where exactly is the InSinkErator reset button located?
On most models, it is a small red overload protector button on the underside of the disposal unit, near the center or side of the bottom housing.
Do I need to unplug the disposal before pressing reset?
Yes. Turn off the wall switch and, if possible, disconnect power at the outlet or breaker before touching the unit.
What does it mean if the reset button keeps popping out?
That usually means the motor is overheating, the disposal is jammed, or there is an electrical problem that needs attention.
Can I use a wrench to fix the problem instead of the reset button?
A disposal wrench is used to manually free a jammed flywheel. If the unit is jammed, clear the jam first, then press the red reset button afterward.