Garbage Disposal Drain Gasket Replacement

If water is pooling under your sink or you notice moisture right where the disposal connects to the drain, garbage disposal drain gasket replacement may be the fix you need. A failing gasket can leak slowly at the seam, then worsen every time the unit runs. The good news: with the right part and careful cleaning, you can replace the seal and restore a tight connection.
For more help, see our GE Garbage Disposal Leaking: Stop Every Leak and Backup guide.
What the Drain Gasket Does
Why a tight seal matters
The drain gasket seals the connection between the garbage disposal’s discharge outlet and the sink’s drain piping/drain tube assembly. When the gasket compresses evenly, it prevents water from escaping at the joint instead of flowing through the drain line. A tight seal also reduces odor and residue buildup, because leaks create wet conditions where grease and food particles stick to surfaces and harden over time.
To get the seal right, focus on two things: correct gasket size and even compression. Uneven tightening or debris on the sealing surfaces can cause a gap, which turns a minor seep into a steady drip under the cabinet.
Signs the gasket is worn, cracked, or misaligned
Look for leaks that concentrate at the disposal drain connection seam, not across the entire cabinet. Common signs include dampness or water trails around the gasket line, residue that looks greasy or slimy near the joint, and pooling on the cabinet floor after the disposal runs. If you remove the access panel and see the gasket edges look flattened, split, or shifted, the gasket is failing or was installed out of alignment.
Another strong indicator is timing: if the leak starts when water flows (hand faucet + disposal) and appears exactly at the joint, the gasket is the likely culprit. If the leak migrates higher/lower along the tube or flange, the issue may be a damaged tube, loose fitting, or the wrong seal type.
How the gasket differs from the drain flange and tube
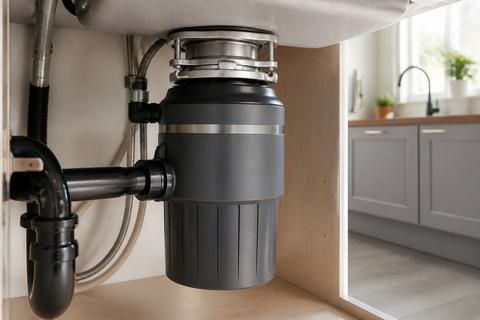
The gasket is the flexible sealing ring that sits at the joint and compresses to stop leaks. The drain flange is the metal or plastic interface at the sink—often held by a mounting ring/assembly under the sink—while the drain tube is the rigid or semi-rigid pipe section connecting the disposal outlet to the rest of the plumbing.
Because they fail differently, you can often narrow the source by where the water shows up. Water at the gasket seam points to the seal itself. Water around the sink flange/mounting ring points to the sink-side seal (like plumber’s putty) loosening or the flange assembly being misaligned. Water at the tube fitting can indicate a cracked tube, a loose clamp, or a damaged tube gasket.
Tools, Parts, and Safety Prep
Choose the right replacement gasket
Use the disposal’s model number and the connection type to pick the correct gasket. A drain connection gasket must match the disposal outlet diameter and the style of your drain assembly (some use a gasket alone, while others pair a gasket with a specific sealant or putty on the flange). If you guess by appearance, you risk a seal that won’t compress correctly.
When ordering, also confirm whether you need a gasket for the disposal outlet-to-drain tube joint (common) versus a gasket for a dishwasher discharge connection (different). Keep the old gasket as a reference for thickness and shape. If your disposal requires a particular sealant, use only the manufacturer-recommended product—overapplying sealant can prevent the gasket from seating properly.
Gather basic tools and leak-proofing supplies
Collect tools that let you remove the connection without damaging the flange or tube. Bring a screwdriver (flathead and/or Phillips as needed), adjustable pliers or a wrench for clamp/fitting hardware, a bucket or towel stack for catch-buckets, and a rag set for cleaning. Use a putty knife or scraper to remove old residue and any hardened sealant from sealing surfaces.
For leak-proofing, plan on having disposable gloves and a small supply of clean water and paper towels for inspection. If your specific assembly uses plumbers putty or a factory-recommended sealant at the flange, obtain that exact product now. Skip generic “liquid sealant” unless the instructions for your disposal and drain connection call for it.
Shut off power and clear the cabinet
Start by making the disposal safe. Turn off the disposer switch at the wall and then switch off the breaker that feeds the disposal circuit if possible. If the disposal has a plug-in cord, unplug it. Never work under the unit with the disposer still live.
Next, clear the cabinet so you can move freely around the drain connection. Pull out stored cleaning products and anything that could fall into the sink drain area. Lay down absorbent towels and keep a bucket nearby to catch residual water. Let the disposal cool if it was recently used.
Remove the Old Gasket and Inspect the Drain Area
Loosen the drain connection without damaging the flange
Before loosening hardware, dry the area with towels so you can track where the leak actually starts. Then loosen the drain connection using the correct approach for your hardware: for clamp-style connections, loosen the clamp screws gradually; for nut/bolt fittings, hold the tube steady with a wrench while you loosen the fasteners.
Avoid twisting the disposal or prying aggressively against the sink flange. If parts feel seized, stop and re-check you’re turning the right fastener—forcing can crack the tube or bend the flange, creating a new leak point that the gasket alone can’t fix.
Once the connection is loose, separate the joint carefully and remove the old gasket. If it sticks, use a plastic scraper instead of metal tools to prevent gouging the sealing surfaces.
Clean away grease, buildup, and old sealant
Remove all residue from both sealing faces: the disposal outlet area and the mating surface on the drain tube/fitting. Grease and mineral buildup prevent full gasket compression and create leak paths. Scrape hardened material gently, then wipe thoroughly with a degreasing cleaner or warm soapy water followed by a dry rag.
If there’s old sealant, remove it completely where the gasket contacts. Any thin smear that remains can prevent the gasket from sitting flat. Pay special attention to the gasket groove/seat area—clear it fully so the replacement gasket rests in the correct plane.
Finish cleaning by wiping the surfaces dry and visually inspecting for pits, cracks, or warping. If the seal surface is damaged, replacement may not hold.
Check the drain tube and mounting surfaces for damage
Inspect the drain tube, the disposal outlet, and the sink-side mounting surfaces for cracks, splits, or deformation. A gasket replacement won’t seal a cracked tube or a bent flange because the mating surfaces won’t meet evenly.
Look for hairline fractures near the joint, loose or missing hardware, and signs of shifting—such as uneven gasket wear patterns. If the dishwasher connection uses a discharge tube or hose clamp near your workspace, check that area too, because it can look like a “gasket leak” when the real failure is at the dishwasher inlet.
If you find a cracked tube, warped flange, or damaged mounting surface, plan to replace the affected part(s) before installing the new gasket.
Install the New Gasket for a Tight Seal
Position the gasket correctly before tightening
Dry-fit the new gasket before you tighten anything. Place it so it sits centered in the groove and matches the joint orientation. The gasket should lie flat without twisting; if it wants to roll or fold, remove it and reseat it before applying tension.
Ensure the joint parts are aligned straight. Misalignment is the fastest way to pinch or shear the gasket, leading to leaks that appear immediately or after a few cycles of use.
Once positioned, bring the disposal outlet and drain tube/fitting together smoothly—no forcing. If you feel resistance that shouldn’t be there, separate and check alignment again rather than tightening harder.
Reassemble the drain tube and connection hardware
Reattach the drain tube/fitting by hand first so the gasket doesn’t shift under torque. Start all nuts/bolts or clamp screws by hand to avoid cross-threading and uneven compression.
If your assembly uses a specific sealant or putty at the flange (follow your disposal instructions), apply it only to the designated sealing surface and only in the recommended amount. Overapplying can squeeze sealant into areas where it prevents the gasket from seating.
After reassembly, make sure the connection hardware is present and seated correctly—missing washers, wrong clamp orientation, or an off-seat ring can cause the gasket to leak even when the gasket itself is new.
Tighten evenly to avoid twisting or pinching the seal
Tighten hardware evenly in small increments. For bolts/nuts, alternate between fasteners so compression increases uniformly rather than pulling one side first. For clamp-style connections, tighten the clamp screws gradually while keeping the tube aligned.
Stop tightening when the joint feels secure and the connection hardware is fully engaged. Over-tightening can deform the gasket and cause it to extrude or crack under vibration.
As you tighten, watch that the gasket edge doesn’t creep out of position. If you notice the gasket moving, loosen and reseat before continuing.
Test for Leaks and Fix Common Problems
Run water and check every joint
With power off at the breaker or switch during setup, reassemble any parts you removed and wipe the area dry. Then turn on the disposal power and run water—start with a slow stream, then add normal flow.
Observe the gasket seam and the surrounding joints for moisture. Use dry paper towels to blot the joint edges: it’s easier to spot fresh dampness than to watch for tiny drips against a wet cabinet.
If you have a dishwasher, run it only if it’s already connected and ready—otherwise, keep the dishwasher off so you can isolate whether the leak is from the disposal drain gasket connection.
Adjust a gasket that still leaks
If you see water at the gasket seam, shut off the disposal and power again. The leak usually comes from misalignment, debris left on a sealing face, or uneven compression.
- Loosen the connection just enough to separate the joint.
- Reseat the gasket centered in the groove, ensuring it lies flat without twisting.
- Reclean the sealing surfaces if you find residue transfer or old sealant remnants.
- Reassemble and tighten evenly in small increments.
If the gasket appears pinched (uneven thickness around the edge), replace it with a fresh one. A pinched gasket may look installed but won’t recover its sealing shape.
Know when the drain tube or fitting needs replacement
Replace the drain tube or fitting when you find physical damage or repeated failure. If the gasket leaks after reseating and thorough cleaning, check for a crack, a warped outlet, or a tube that no longer sits straight in the connector. Plastic drain tubes can warp from overtightening or impact.
Also replace parts if the seal surface has gouges or pitting that prevent full gasket contact. A new gasket can’t bridge gaps created by broken or deformed mating areas.
If water keeps appearing at the wrong joint (like above the gasket line or around the sink flange hardware), the problem may be a different seal entirely, such as the flange mounting ring seal rather than the disposal drain gasket.
Cleaning and Maintenance Tips
How to clean the gasket without damaging it
After installation, clean the area around the gasket periodically to prevent grease buildup from creating pressure points and residue channels. Turn off power at the switch/breaker, then wipe with a damp cloth and mild dish soap. Avoid harsh abrasives that scratch sealing surfaces or leave grooves the gasket can’t bridge.
If there’s slime or mineral buildup, use a soft brush and warm soapy water. For mineral residue, a vinegar-based cleaner can help on non-metal surfaces, but keep it away from any parts your disposal manufacturer warns against and wipe thoroughly afterward.
Never scrape the gasket itself with metal tools. If you notice the gasket edge is already brittle or cracked, cleaning won’t restore its seal—plan on replacement instead.
Prevent odor, slime, and hard-water buildup
Reduce buildup by running cold water whenever you use the disposal and avoid pouring grease or fibrous food into the drain. Use enzyme-based disposal cleaners monthly if your disposal accepts them; they reduce odor-causing residue without damaging plastic and rubber seals.
If you live in hard-water areas, mineral deposits can form around joints. Flush with regular water flow and clean the drain area under the sink as part of your routine. Keep the area dry after maintenance so small leaks don’t grow into larger ones.
Finally, check that dishwasher discharge and drain hose connections remain secure. Backflow or slow draining increases moisture around the disposal connection and accelerates gasket wear.
Signs it is time to replace the gasket again
Replace the gasket again when you see water returning at the same seam after cleaning and proper tightening. Other signs include visible cracking, flattening, or a gasket that no longer springs back to shape when handled (if your design allows inspection).
You should also replace it if the gasket shows extrusion—where material appears squeezed out of the groove—or if the gasket edge looks uneven from the start. Persistent dampness, grease trails reappearing quickly, or recurring cabinet wetness after short disposal use are clear indicators the seal is failing.
If you need to repeatedly reseat the gasket, the underlying sealing surface or connection hardware may be damaged and needs correction.
When the Problem Is More Than the Gasket
How a faulty drain pump or pipe can mimic a gasket leak
Not all leaks originate at the gasket. A failing drain pump (on units that have one) or a clogged drain line can cause water to back up and leak through the path of least resistance—which can appear to be the gasket area. If water rises inside the sink area or drains slowly, pressure changes can force seepage at the disposal connection.
To differentiate, watch where water first appears: leaks that start simultaneously at multiple joints or appear only after prolonged operation often point to a drain restriction or internal plumbing issue. If you notice gurgling, slow drainage, or water backing up, address the drain line first rather than replacing seals repeatedly.
When to replace the disposal, flange, or connected piping
Replace components when damage is structural. If the disposal’s mounting or outlet area is warped, a gasket replacement won’t hold. If the sink flange assembly is loose or the mounting surfaces are damaged, the seal at the flange may be the real source, and replacing the flange/mounting ring is necessary.
Also replace connected piping when you find cracks or deformation at the tube or fittings. A cracked discharge tube or split connection fitting can leak again no matter how well you install a gasket.
In rare cases, if the disposal has a failed internal seal and water is dripping from the motor housing area, the unit must be replaced rather than repaired.
Simple checks before calling a plumber
Before calling for help, isolate the leak source with quick, targeted checks. Dry the cabinet area, run water for a few seconds, then note whether moisture appears exactly at the gasket seam, at the sink flange, or higher along the tube.
- Check for a loose dishwasher discharge connection if a dishwasher is installed; an inlet hose clamp or discharge tube gasket can look like a disposal gasket leak.
- Inspect hardware tightness on the drain connection and ensure the tube isn’t rotated or kinked.
- Confirm the sink drain flange/mounting ring seal isn’t the wet area—fixing the wrong seal wastes time and money.
If the water originates from the drain line after the disposal runs or you see signs of backflow, stop gasket troubleshooting and address clogs, venting issues, or pump/pipe faults.
Frequently Asked Questions
How do I know if the garbage disposal drain gasket is the leak source?
Dry the area, run water slowly, and watch the gasket, drain tube, and flange separately. If moisture appears exactly at the gasket seam, the seal is likely failing. If the leak starts above or below it, another part may be cracked or loose.
Can I reuse the old gasket after cleaning it?
You can clean a gasket if it is only dirty, but reuse is risky if it is flattened, cracked, hardened, or warped. A worn gasket often leaks again even after cleaning.
Do I need plumber’s putty or sealant with a replacement gasket?
It depends on the connection design. Some assemblies seal with the gasket alone, while others also use putty or a factory-recommended sealant at the flange. Follow the disposal’s instructions and avoid overapplying sealant.
Why does the drain leak only when the disposal runs?
A leak that appears only during operation can point to vibration, a loose connection, or a gasket that is not seated evenly. It may also indicate a crack in the drain tube or a problem with the sink flange connection.
What if the replacement gasket still won’t seal?
Check for misalignment, overtightening, debris on the sealing surface, or a damaged drain tube or flange. If the mating parts are warped or cracked, the gasket alone will not solve the leak.