Convert Hardwired Garbage Disposal to Plug
If your kitchen disposal is hardwired, but you want the convenience of a plug-in setup, you’re probably tired of having to reach behind the sink to control it. Converting a convert hardwired garbage disposal to plug installation can also make future service easier—if it’s done safely and with the right parts. The key is verifying your disposal model supports a cord connection and that your wiring and outlet meet code.
For more help, see our GE Garbage Disposal Installation: Removal, Wiring, and Setup guide.
What Changes When You Add a Plug
Hardwired vs. plug-in disposal basics
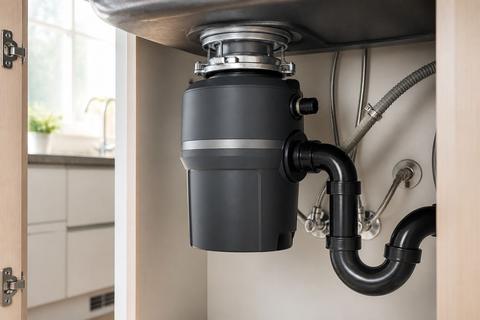
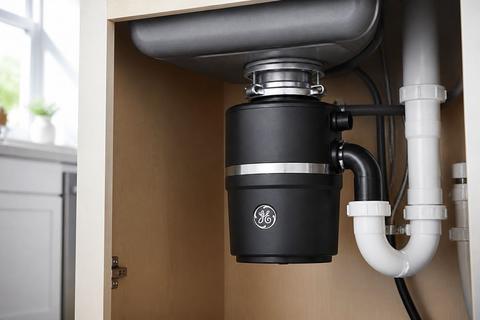
A hardwired garbage disposal is wired directly into the wall circuit, so it’s powered without using a cord-and-plug connection. A plug-in disposal instead uses a manufacturer-approved cord kit that plugs into a properly grounded receptacle, and control can come from a wall switch or a switched outlet (depending on how you set it up). The grinding motor, switch design, and discharge system stay the same; only the power connection method changes. This conversion typically involves creating (or using) a code-compliant receptacle under the sink and ensuring the disposal housing includes a cord connection compartment designed for that purpose.
When a conversion is allowed and practical
You can convert many disposals if the manufacturer provides an approved cord kit and the electrical compartment includes a designed cord connection method (with strain relief and correct wire routing). It becomes impractical when the motor housing is hardwired-only, the wiring compartment is sealed with no cord-kit provision, or the model is specifically restricted to direct wiring in the installation manual. Local code also matters: in many areas, disposals require protection by GFCI and proper grounded outlets. Before buying parts, verify your exact model number and read the “electrical connection” section of the disposal’s manual.
Safety issues to check before starting
The biggest safety risks are shock hazards and improper grounding. First, shut off power at the breaker (not just the wall switch) and use a non-contact voltage tester on the disposal wiring to confirm it’s dead. Make sure the disposal wiring compartment is accessible and dry—no standing water under the sink. Check the circuit type and protection: a disposal needs the correct amperage and grounding, and it must be GFCI-protected if required by local code. Finally, never bypass grounding pins, never use a light-duty extension cord, and never force a cord kit that doesn’t match the disposal’s designed connection.
Tools, Parts, and Electrical Prep
What you need for the conversion
Gather parts before you disconnect anything. You need a garbage-disposal cord kit specifically listed for your disposal model (or the manufacturer’s approved universal kit), the matching plug end, and a strain-relief component included with the kit. You also need basic electrical tools: a screwdriver set, wire stripper (if the kit requires it), needle-nose pliers, electrical tape, wire nuts or connectors supplied with the kit, and a flashlight. For mounting and access, have a towel/bucket to manage drips, and confirm you have enough clearance behind the disposal for the cord routing. If you plan a new receptacle, have the proper outlet and cover plate as well.
Choosing the right cord kit and plug
Use only a cord kit designed for garbage disposals with the correct wire gauge, grounding method, and strain relief. The strain relief matters because the cord jacket must be clamped so pull forces never transfer to the internal wiring. Match the kit to your disposal’s electrical rating and connection style; do not assume “any” disposal cord fits. For the plug end, use the kit’s provided grounded plug type rather than substituting random cords. If your disposal manual lists a specific kit part number, buy that exact kit so the housing cover and clamp align correctly.
Shutting off power and verifying the circuit
Shut off power at the breaker labeled for the kitchen disposal circuit, then unplug nothing from the disposal because it’s hardwired. With the breaker OFF, open the disposal’s electrical compartment and check wiring using a non-contact voltage tester to ensure there is no voltage. If you’re also installing a new receptacle or switching setup, keep the receptacle circuit de-energized while working—turn off the correct breaker for the outlet as well. When the compartment is open, route and organize wires so they won’t fall back into the housing during assembly. Only proceed when you’ve confirmed the circuit is dead.
Converting the Disposal Housing
Opening the electrical compartment
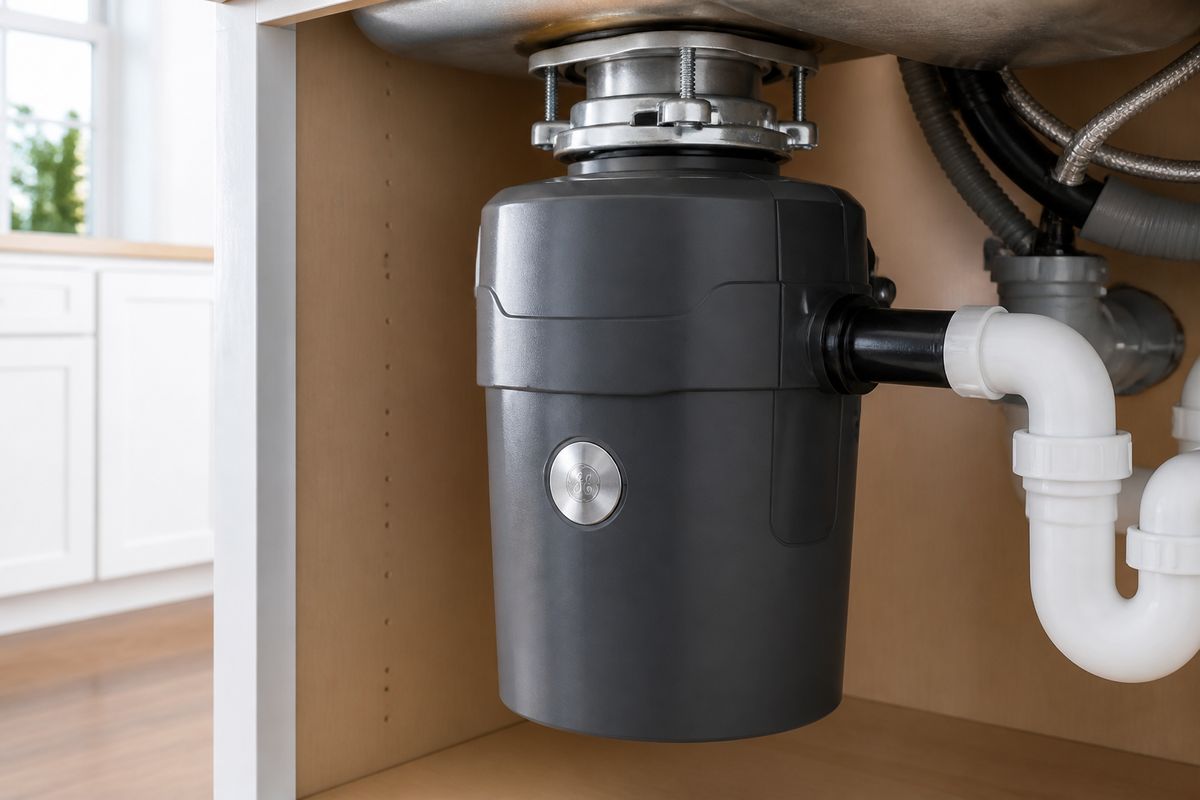
With power off at the breaker, position a towel under the disposal connection points to catch drips. Remove the disposal’s wiring cover from the bottom or side electrical compartment (location depends on model) using the correct screwdriver. Look for the factory wiring layout and the compartment’s built-in cord-kit provision—there should be a place for the cord strain relief and terminals. Keep track of any screws and gaskets. Do not pull on wires; instead, loosen the cover plate, then set it aside. If you see sealed components or no strain-relief knockout/feature, stop and confirm the disposal model truly supports cord conversion.
Installing the power cord strain relief
Install the strain relief exactly as the cord kit instructions specify. The strain relief is what prevents the cord from being pulled out and prevents stress on the internal connections. Feed the cord through the cord-entry opening in the housing and clamp the cord jacket using the included nut/clamp mechanism so the outer insulation is secured. Leave enough cord length inside the housing to reach the terminal area without tension, but not so much that it droops against moving parts. Tighten the strain relief firmly enough to stop cord movement by hand. The cord should remain stationary when you gently pull on it.
Connecting the hot, neutral, and ground wires
Connect the cord conductors to the disposal’s matching terminals: hot (often black), neutral (often white), and ground (green or bare copper). Follow the manufacturer’s terminal labeling inside the compartment—do not guess by wire color alone if the factory wiring uses different colors. Typically, you’ll land each conductor under the terminal screw or into the provided connector. Ensure the ground is bonded using the grounding screw or ground terminal designed for it; never cap and leave the ground unconnected. Use only the connectors included with the cord kit when required, and tighten terminals so no copper is exposed outside the connector.
Closing and securing the wiring cover
Before closing, arrange wires so they do not press against the cover or get pinched by it. Confirm the strain relief clamp is tight and the cord jacket cannot slide through. Reinstall the wiring cover using the original screws and ensure the compartment is fully seated with no gaps. If the disposal uses a rubber gasket, place it correctly to prevent moisture ingress. Route the cord so it won’t rub on sharp metal or interfere with the sink flange and mounting hardware. After the cover is secure, you can reinstall the disposal body onto the mounting assembly.
Adding a Switch or Outlet Setup
Using a wall switch with a plug-in disposal
A plug-in disposal can still be controlled by a wall switch if the switched power feeds the receptacle you’ll use under the sink. In this setup, the receptacle is wired so the outlet is “hot” only when the switch is ON, and your disposal plug is always connected to that outlet. Install the disposal cord so it plugs into the receptacle, not directly into a non-switched outlet, if you want wall-switch control. Use a switch and receptacle wiring method that matches local code, and avoid any makeshift “inline switch” on the cord that can violate safety rules.
Wiring to a switched outlet under the sink
If you’re using an outlet under the sink, use a proper receptacle installation with a grounded connection and correct circuit protection. Turn off the breaker, then wire the receptacle so the hot feed comes from the switch (line/load arrangement depends on the switch type). Use the correct outlet wiring terminals, and torque or tighten screws firmly as specified on the device. Secure all wire connections inside the electrical box where applicable—no exposed bare conductors. After re-energizing, switch ON should power the disposal through the plug, and switch OFF should cut power to the outlet.
When a GFCI outlet is recommended
Many jurisdictions require GFCI protection for kitchen sinks, and a GFCI receptacle is the common solution where it’s needed. If your code requires GFCI, install a GFCI receptacle and wire it correctly (including line vs. load terminals, which are labeled). If you’re unsure whether your existing circuit is already GFCI-protected upstream, check the breaker (if labeled) or look for GFCI devices in the kitchen circuit path before adding another. A GFCI outlet should also be compatible with the disposal’s cord plug and rating. This approach reduces shock risk if moisture gets into the outlet area.
Mounting, Testing, and Leak Checks
Reinstalling the disposal after the conversion
Reinstall the disposal onto the sink mounting assembly, keeping the cord and plug accessible and not stretched. Confirm the discharge flange and mounting ring are seated properly so the unit sits level and doesn’t stress the plumbing connection. Reconnect the discharge tube to the disposal’s outlet using the correct clamp or gasket included with the plumbing kit—tighten it so it seals without cracking. If your disposal uses an anti-jam or support component, ensure it’s installed as originally configured. Once mounted, plug the disposal cord into the outlet (or keep it unplugged if your model is designed to be tested before full use).
Testing the motor before full use
Before grinding anything, test the disposal with fresh power. Turn the breaker back ON, then turn ON the wall switch (or switch the receptacle) and start the disposal for a few seconds. If the unit has a red overload reset button on the bottom of the motor housing, press it until it clicks if the disposal won’t start; let it cool a few minutes first. If the disposal hums but the motor won’t spin, cut power at the breaker, then use a 1/4-inch hex (Allen) wrench in the hex socket on the underside and rotate the impeller plate to free it, then press reset and try again. Do not force the mechanism by hand.
Checking for leaks, noise, and tripping issues
Run a short water flow and check for leaks at the sink flange and at the discharge connections. A leak at the sink flange usually means the plumber’s putty seal or mounting ring has loosened; reseat the mounting components to fix it. A leak from the dishwasher connection area is typically a hose clamp or dishwasher discharge tube gasket issue. If you see water dripping from the bottom housing, the internal seal has failed and the disposal must be replaced, not repaired. Listen for grinding of objects and unusual metal-on-metal noise. If the breaker trips repeatedly, stop and address the electrical issue—do not keep trying to start the unit.
Common Problems and When to Call a Pro
Cord won’t fit or wiring space is too tight
If the cord kit doesn’t seat correctly or the wiring cover won’t close, stop and confirm you have the exact kit for your disposal model. Many disposals require specific internal routing so the terminals don’t bind. Open the compartment again and confirm the cord strain relief is positioned correctly and that wires are not twisted into the cover seam. If the housing compartment is sealed or the cord entry cannot align with the strain-relief hardware, the model likely isn’t designed for a plug conversion. Tight spaces can also lead to pinched insulation—never force the cover shut if you see damaged or pinched wires.
Disposal hums, trips, or will not start
A hum but no spin indicates a jammed flywheel/impeller. Cut power at the breaker, use a 1/4-inch hex (Allen) wrench in the underside hex socket to free the impeller plate with a full rotation, then press the red overload reset button in until it clicks and restore power. If it will not start at all, press reset after letting the motor cool a few minutes. If the breaker trips immediately, do not keep restarting—check for shorted connections, wrong terminal wiring (hot/neutral/ground mis-landed), and correct cord strain relief seating. Persistent tripping can also indicate a failing motor and needs professional diagnosis.
Signs the circuit needs a licensed electrician
Call a licensed electrician if you must add or relocate the receptacle, change the circuit wiring method, or you’re not sure which breaker feeds the disposal/outlet. Get help if you see aluminum wiring in the box without proper rated connectors, damaged insulation, burned marks, or if the existing junction box is unsafe. If the disposal requirements conflict with your current outlet type (missing ground, wrong receptacle rating, or no GFCI where required), an electrician should correct it. Also call if GFCI behavior is confusing (nuisance tripping) or if your disposal conversion depends on modifying a junction box you can’t access safely.
If There Is No Outlet Under the Sink
Safe ways to add a receptacle
You can install a receptacle under the sink, but it must be done with correct wiring, correct grounding, and proper protection. The safest approach is to add a dedicated receptacle circuit or connect to an existing permitted circuit feeding the kitchen counter area, depending on local code. Use a receptacle location that allows the disposal plug to reach without strain, and install a weather-resistant cover if required. Run conductors in proper cable/conduit where needed and install the receptacle in an approved electrical box. Have wiring inspected if required in your area. A licensed electrician should handle the work when the route is unclear or when circuit changes are needed.
Why extension cords are a bad solution
Extension cords are not a permanent solution for a garbage disposal. They are not designed for the disposal’s motor load, starting surge, and under-sink heat/moisture exposure. They can overheat, cause voltage drop, and create a fire or shock hazard. Extension cords also introduce additional connection points where failures are common, especially in tight cabinet spaces. Using an extension cord defeats the safety design of a fixed receptacle with correct grounding and strain relief. Instead, install a proper receptacle where the disposal cord can plug in directly, securely, and safely.
Alternatives if rewiring is not feasible
If you can’t add an outlet due to layout or wiring constraints, consider alternatives that keep you within code and manufacturer guidance. Options can include installing a permitted switched outlet by extending wiring in an approved manner, relocating the disposal to a configuration that matches available wiring, or replacing the disposal with a model and kit configuration that matches your current electrical setup. If the existing circuit is hardwired-only and you cannot reach a safe box location, a licensed electrician can propose code-compliant solutions without temporary wiring. Avoid non-approved adapters or improvised switch wiring on the cord.
Frequently Asked Questions
Can any hardwired garbage disposal be converted to a plug?
Most disposals can be converted if the motor housing has a cord connection compartment and the manufacturer allows it, but some models are hardwired-only or limited by local code. Check the installation manual before buying parts.
Do I need an electrician to convert a hardwired disposal to a plug?
Not always, but an electrician is the safest choice if you need to add an outlet, change the circuit, or are not comfortable working inside an electrical junction box.
Can I plug a garbage disposal into a regular outlet?
Yes, if the outlet is properly grounded, correctly rated, and permitted by local code. In many kitchens, a GFCI-protected outlet is recommended or required.
What kind of plug or cord should I use?
Use a cord kit designed for garbage disposals with the correct gauge, grounding, and strain relief. Do not use a light-duty extension cord or an undersized cord.
Is it safe to wire a garbage disposal switch to an outlet?
Yes, when the switch and outlet are wired correctly and the circuit is protected appropriately. The disposal should be controlled by a proper switch or switched outlet, not a makeshift setup.
What if there is no outlet under the sink?
You can have a receptacle installed by a qualified person or evaluate whether a new circuit is needed. Avoid using an extension cord as a permanent solution.