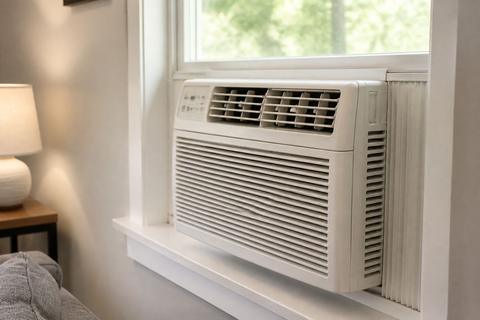
Window AC Running but Not Cooling: Causes and Fixes
If your window air conditioner is running but not cooling, you’re probably hearing the fan, seeing lights, and still feeling warm air. That’s frustrating—especially when the unit seems “on” and you can’t figure out why it won’t bring the room down. The good news: most causes are airflow, settings, or installation issues you can address quickly.
For more help, see our Window Air Conditioner Not Working: Diagnose Every Common Cause guide.
Start with the basics: airflow, settings, and airflow restriction
Cold air can’t form if the unit can’t move enough air across the evaporator and condenser. Fix the simple stuff first—wrong mode and blocked airflow are the fastest wins.
Confirm the mode, temperature, and fan settings
- Set Mode to Cool (not Fan, Dry, or Auto).
- Set the thermostat Temperature to at least 68°F (or 10°F lower than the current room temperature).
- Set Fan to High for troubleshooting.
- If your unit has a Sleep mode, turn it off and run on Cool + High.
Then watch what changes: the fan should keep running, but after the compressor engages (after a short delay), you should feel noticeably cooler air within a few minutes. If the settings are correct and airflow is strong, move to filtration and vents next.
Check whether the air filter is clogged or dirty
A dirty filter blocks airflow, which prevents proper coil cooling and can lead to warm output or icing. Clean air is essential for the compressor to remove heat.
- Turn the unit off and unplug it if the design allows safe access.
- Open the front grille and pull out the washable mesh filter.
- Rinse under lukewarm water until debris clears, then shake off excess water.
- Let the filter fully dry before reinstalling (wet filters restrict airflow).
- If your unit shows a Filter / Reset Filter reminder (common after ~250 run-hours), press the Filter Reset button after reinstalling.
After cleaning, look for improvement in airflow. If the fan stays strong but air remains warm, inspect the grille, vents, and return airflow.
Inspect the front grille, vents, and return airflow
Even with a clean filter, blocked intakes or closed louvers can stop the unit from pulling enough air across the coils. Also check for obstructions near the window opening.
- Remove anything in front of the air outlet (curtains, furniture, rugs).
- Make sure the front intake grille is clear and seated properly.
- Confirm the air outlet louvers are not aimed directly at the window frame where hot air can re-enter.
- Check that the unit isn’t being squeezed by the window sash—air needs space to move freely.
If you can’t get strong airflow from the front, you’re likely dealing with restriction from a blocked grille, misalignment, or install issues—address those before assuming a compressor problem.
Figure out whether the unit is actually losing cooling performance
Not cooling can mean the compressor isn’t starting, the evaporator is iced, or the system can’t transfer heat effectively. Your goal here is to tell which stage is failing.
Tell warm air from low airflow
A compressor can be working but overwhelmed by airflow restriction—so first separate “warm” from “not much air.”
- Feel airflow at the outlet after setting Cool + High.
- Compare it to normal operation: is air weak and tepid, or strong and clearly warm?
- Stand near the return side (behind the front intake) and confirm you’re not getting a stagnant, low-velocity pull.
Low airflow usually points back to filters, grills, or installation sealing. Strong airflow with no temperature drop points to cooling-side issues like dirty coils, icing, low refrigerant, or failed electrical components.
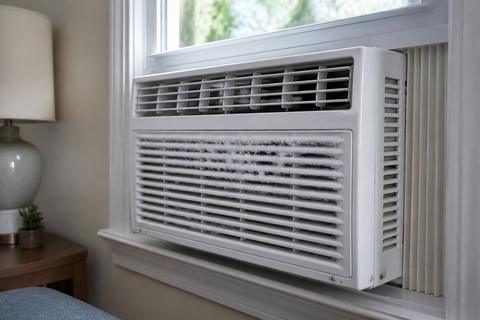
Look for ice on the evaporator coils or inside the cabinet
Ice on the evaporator is a clear sign the coil can’t absorb heat properly—often caused by airflow restriction, a dirty coil, or low refrigerant.
- Turn the unit off and unplug if you need to access the front.
- Look for frost or ice on the coil area behind the filter/front intake.
- Check for ice along the underside edges inside the cabinet where condensate and cold lines may freeze.
- If you see ice, run Fan Only until the ice fully melts, then clean the filter and coils.
If ice refreezes quickly after cleaning, focus on airflow and coil cleanliness first; if it continues, sealed-system refrigerant imbalance is a likely cause requiring professional service.
Check for signs the compressor is not engaging
If the fan runs but the compressor doesn’t start, the air will stay warm. Many window units enforce a compressor-protection delay after power cycling.
- Turn the unit off.
- Wait at least 3 minutes (most window ACs use a compressor delay).
- Turn the unit back on and set Cool + High.
- Listen for a compressor “start” sound (a low hum) and watch for vibration changes in the cabinet.
If the fan runs continuously and you never hear/feel compressor engagement after the delay, move to electrical checks and cooling-side issues.
Solve the most common cooling problems yourself
Start with cleaning and installation fixes. These address a majority of “runs but won’t cool” cases without opening sealed components.
Clean the filter, coils, and condenser fins
Dirty coils reduce heat exchange and stop cooling capacity fast. Clean both the indoor-side evaporator and the outdoor-facing condenser fins.
- Remove and wash the filter; let it dry completely.
- Use a vacuum with a brush attachment on the coil area dust around the intake.
- Clean condenser fins (front/outdoor side depending on model) using coil-cleaning spray per label directions.
- If fins are bent, straighten gently with a fin comb (or a plastic comb) to restore airflow.
After cleaning, run the unit on Cool + High. If cooling improves briefly then fades, you may be dealing with icing, a refrigerant issue, or an electrical component.
Make sure the unit is tilted and installed correctly
Window ACs must drain condensate outdoors. If the unit tilts the wrong direction, it can cause water management problems and can contribute to icing or poor cooling performance.
- Check the installation: the unit should tilt slightly toward the outside about 1/4 to 1/2 inch.
- Measure by placing a level across the front and adjust the window angle if needed using the provided frame pads/spacers.
- Ensure there’s no gap that lets hot air blow directly back into the cabinet.
Correct tilt is also tied to normal draining. Next, seal gaps so hot air doesn’t overwhelm the system.
Seal gaps around the window to keep hot air out
Leaky window frames let outside hot air re-enter, forcing the AC to fight heat it’s bringing back into the room.
- Apply weather stripping or foam insulation around the sides and top of the unit where the sash meets the frame.
- Seal any visible gaps between the AC chassis and the window opening.
- Keep indoor curtains from sealing the front intake or outlet.
If your window unit is trying to cool while also constantly ingesting hot air, it may run continuously without reaching the set temperature. Then address drainage, especially if you see excess dripping.
Clear the drain path and understand normal water dripping
Some water dripping is normal. Most window models have a slinger fan that splashes condensate onto the hot condenser coil, creating a rhythmic sloshing or “pssst” sound; that’s not a malfunction. Excess dripping indoors usually means blocked drainage or wrong tilt.
- Check the condensate drain path and clear any debris from the drain area (often at the base of the indoor-side pan).
- Verify the correct outward tilt so condensate flows out.
- If water pools inside, remove the front grille and check for standing water, then inspect drain holes for clogs.
If dripping inside started after a tilt or cleaning change, fix tilt and drain before chasing refrigerant issues.
When the air conditioner runs but still blows warm air
When the fan runs but air stays warm, the cooling system isn’t doing its job. This section focuses on refrigerant/sealed-system clues, electrical parts, and power/reset steps.
Understand low refrigerant and sealed-system issues
Low refrigerant or a sealed-system fault reduces the ability to absorb and release heat, leading to warm air and/or icing.
- Look for persistent ice buildup even after cleaning and airflow correction.
- Watch for symptoms like weak cooling after a short improvement, and heavy condensation behavior that doesn’t match the expected pattern.
- Check your unit’s display codes if it has them (for example, some Midea-built models show E1 for a sensor issue or EC for refrigerant leak detection; LG units may show CH-prefixed codes).
Sealed-system work requires recovery/charging and leak testing—call an HVAC technician rather than attempting DIY refrigerant top-ups.
Check the fan motor, capacitor, and electrical components
Electrical failures can let the fan run while the compressor fails to start. A capacitor problem is common in window units.
- Unplug the unit and remove the front access panel to find the control area.
- Inspect for loose wires, burned spots, or a smell of burnt plastic.
- If the unit buzzes or clicks repeatedly without cooling, suspect a failing capacitor or protection circuit.
- If your unit has an onboard diagnostic code, match the flashing code to the manual and don’t guess.
Because capacitor work can involve high-voltage components, if you don’t have experience, use the observation to decide on technician service instead of forcing repairs.
Reset the unit and rule out power-supply problems
A power issue can prevent proper compressor operation even when the fan starts. Also account for the built-in compressor delay.
- Unplug the AC for at least 5 minutes.
- Plug it back in and set Cool + High.
- Wait 3 minutes for compressor-protection delay before judging results.
- If you’re on a circuit with a cord that includes a TEST/RESET leakage detector, press RESET firmly until it clicks; then press TEST briefly per the cord instructions and ensure it stays reset.
If the cord trips again immediately, the leakage detector or internal wiring is faulty—do not bypass it.
Why your window AC may keep running without cooling enough
Even a working AC can feel like it “never cools” if the unit is undersized or overwhelmed by heat load, humidity, and sun.
Match the BTU size to the room size and heat load
If the AC is too small, it will run nonstop and still fail to reach the set temperature. Use a BTU calculation based on your room’s square footage and heat conditions.
- Start with your room’s square footage and check the unit’s labeled BTU capacity.
- Increase your expected BTU for heavy sun exposure, high ceiling rooms, or spaces with lots of people.
- If the unit can’t bring the room down even after airflow cleaning and proper installation, undersizing is a top cause.
If sizing is correct and performance still doesn’t improve, consider humidity and environment next.
Account for sun exposure, open doors, and humidity
Warm air entering and humid air reduces comfort even if the AC is running.
- Keep blinds or curtains closed on the sun-facing side.
- Minimize door opening and airflow from other rooms during peak heat.
- Use a dehumidifier in extreme humidity areas only if needed—window ACs remove moisture, but heavy humidity can keep the room feeling warm.
High humidity can also contribute to icing cycles if airflow is restricted. If the unit is aging or the cooling gets worse over time, the next section explains why.
Know when the unit is simply undersized or aging
As window ACs age, efficiency drops due to coil wear, fan performance decline, and component deterioration. If cleaning and correct installation fail to restore cooling capacity, the unit may be at the end of its useful life.
- Track performance: if cooling steadily gets weaker year after year, repairs may stop making sense.
- If the compressor runs but cooling never reaches the setpoint, and the unit is near its expected service life, replacement becomes more cost-effective.
- If multiple components have failed or you keep seeing electrical protection interruptions, aging is likely.
Next, watch for warning signs so you know when it’s a drain/tilt issue versus a real electrical or mechanical problem.
Water leaks, noise, and other warning signs to watch for
Some noises and some condensation are normal. The key is distinguishing normal condensate behavior from signs of blockage, wrong tilt, or electrical failure.
Differentiate normal condensate from a real leak
Condensation is expected—window ACs remove moisture from indoor air. Normal behavior often includes rhythmic dripping or sloshing as water is splashed onto the condenser coil.
- Look for dripping that follows the expected cycle and stays mostly in the cabinet drain/pan area.
- Check that the unit tilts toward the outside so water drains outdoors rather than pooling inside.
- If you see water leaking through areas that aren’t meant to collect water (around the window sides or floor), treat it as a real leak.
If water is inside and pooling, it’s usually drainage or tilt. If you hear electrical sounds, focus on safety.
Identify when dripping inside means a clogged drain or bad tilt
Water inside usually means either the unit isn’t tilted correctly or the drain path is blocked, causing condensate backup.
- Confirm tilt with a level and adjust to 1/4 to 1/2 inch outward.
- Clear the drain path and remove debris blocking drain holes.
- If the unit iced up and then melted, dripping may increase temporarily—keep an eye on whether it returns after the coil clears.
- Make sure no heavy condensation is backing up due to a blocked pan.
If the unit still leaks after tilt and drain corrections, check for airflow/icing cycles and consider professional inspection.
Watch for buzzing, clicking, or tripped breakers
Electrical warning signs can indicate failing capacitors, loose wiring, or protection trips—dangerous issues you should not ignore.
- If you hear repeated clicking without the compressor starting, suspect capacitor/protection issues.
- If you smell burnt plastic, shut it off immediately and do not run it again.
- If breakers trip, identify whether it trips instantly (wiring/short) or after running (component overheating).
- If using a UL-required safety plug with TEST/RESET, do not bypass if it trips; press RESET once and stop if it won’t stay reset.
If these signs appear alongside “runs but no cooling,” the problem is likely more than cleaning.
When to repair, replace, or call a technician
Decide based on the likely failure type and what you’ve already corrected. Simple fixes are worth DIY; sealed-system and electrical faults often justify professional help.
Decide if the problem is worth a DIY fix
DIY is appropriate when the issue is clearly airflow, filter/coil cleanliness, installation tilt, or sealing gaps.
- Start with cleaning: filter, accessible coils, and condenser fins.
- Correct tilt and air sealing around the window frame.
- If the unit improves after these steps but performance returns quickly, do not keep repeating the same DIY actions—move to diagnostics.
If the unit never cools and shows signs of compressor or refrigerant problems, DIY will likely stall.
Recognize sealed-system repairs that require an HVAC pro
Call a technician if you suspect refrigerant loss, compressor failure, or major sealed-system faults.
- Persistent icing that returns quickly after cleaning points to sealed-system problems or low refrigerant.
- Error codes related to sensors or refrigerant leak detection (per your model’s manual) are technician territory.
- Warm airflow with signs the compressor isn’t properly starting and no airflow restrictions remain suggests electrical or mechanical cooling-side failure beyond DIY.
Sealed-system repair requires specialized tools for leak detection and proper refrigerant charging.
Know the signs it is time to replace the window AC
Replacement is usually the best value when repairs are frequent or performance won’t return.
- The unit repeatedly trips breakers or shows ongoing electrical failures.
- Cooling capacity remains poor after cleaning, correct tilt, sealing, and reset/delay considerations.
- The unit is old and inefficiency is steadily increasing—particularly if you’re paying for multiple service calls.
If the unit can’t maintain basic cooling despite correct setup, replacement reduces energy waste and downtime.
Frequently Asked Questions
Why is my window air conditioner running but not cooling the room?
The most common causes are a dirty filter, blocked airflow, incorrect settings, frozen coils, poor installation, or a mechanical/electrical failure that prevents the compressor from cooling properly.
Why is my AC blowing air but not cold air?
If the fan works but the air is warm, the issue is usually with the cooling side of the system: dirty coils, ice buildup, low refrigerant, a failed capacitor, or a compressor that is not starting.
Can I run a window AC constantly?
Yes, many units can run for long periods, but they should still cycle normally. If it runs nonstop and never cools, that usually points to a problem with size, airflow, insulation, or the unit itself.
Why does my window AC spit or drip water?
Some condensation is normal. Excess dripping inside usually means the unit is not tilted properly, the drain path is blocked, or moisture is backing up due to poor installation or icing.
How do I know if my window AC is too small for the room?
If the unit runs all day, never reaches the set temperature, and the room stays humid or warm, it may be undersized for the square footage, sunlight, ceiling height, or heat from appliances and people.
When should I call an HVAC technician?
Call a pro if the unit has a sealed-system problem, repeatedly trips power, has a burnt smell, makes loud electrical noises, or still will not cool after cleaning, resetting, and checking installation.